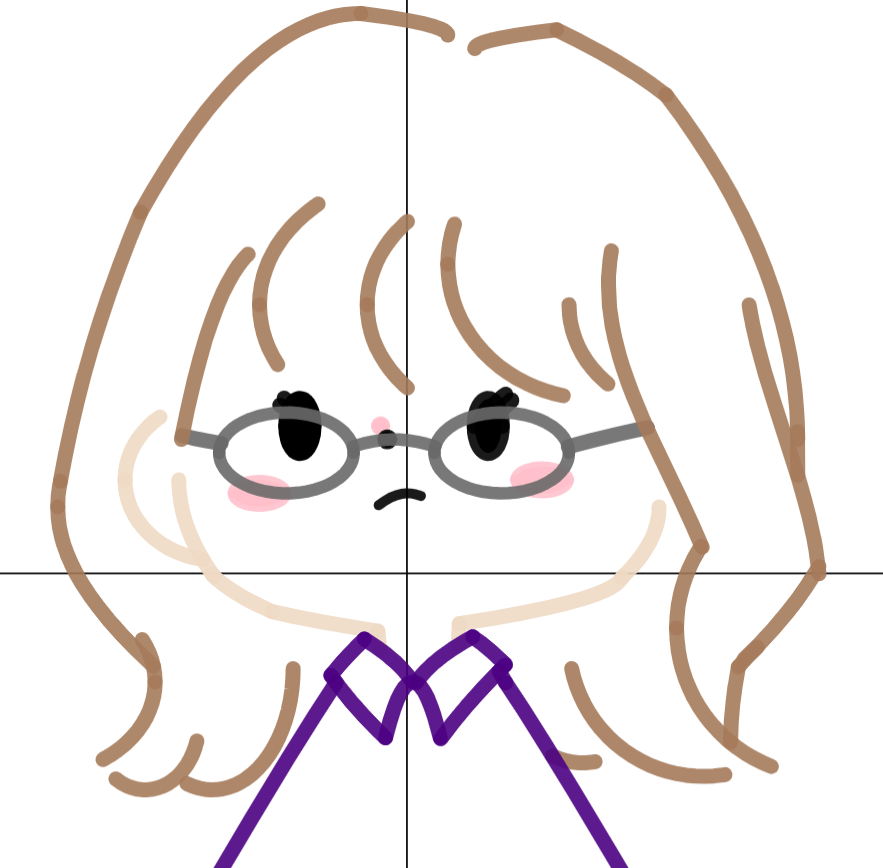
Creating the Portrait
For the last unit in Pre-Calc 12, we were tasked to create a self-portrait in Desmos. I chose to create mine in more of a cartoon style, for more creative freedom and simplicity.
I first started out with the hair. I worked my way from top to bottom (left side first) first using radical functions. These were easy to manipulate into the waves of the hair that I wanted. I used this equation with the variables:
- y= a (√ x – b) + c
From this, I was able to add sliders, and adjust to my liking. Once I was happy with how the equation looked, I then inserted the values from the sliders into the actual equation. I used this strategy for my entire project.
For the bottom of the hair, I used ellipses, restricting the domain and range to make it look like wavy hair at the ends. I did the same with the bangs as well.
For the right side of the hair, I noticed that I could potentially use a sin wave, however, it would need to be rotated vertically so that it would point up and down instead of left and right. To do this, I had to do research to find the equation. I ended up finding the equation:
- cos(T)y – sin(T)x = sin(sin(T)y + cos(T)x)
By adding a slider for “T”, I was able to rotate the function to my liking. I was also able to add vertical/horizontal translations, as well as compressions/expansions by adding additional variables with sliders.
I then worked on the shirt portion of the portrait. I used a hyperbolae (one side of a hyperbola) to create the base of the shirt. To flip the hyperbolae, I used the equation:
- (x-h)^2/a^2 – (y-k)^2/b^2 = -1
I then used a mix of radical equations and a parabola to create the collar.
For the face, I used ellipses for the eyes, cheeks, and glasses, then circles for the nose. By turning the equation into an inequality, I was also able to fill in the shapes. I then used a hyperbolae for the mouth, again, flipping the hyperbolae. For the eyelashes, glasses arms, jaw, and neck, I used radical functions.
Desmos only has six colour options to choose from, so I had to import my own costom colours. To do this, I found the RGB values online for the colours I wanted (brown, beige, purple, pink, gray), and imported them using the line:
- cn = rgb(r, g, b)
A small detail that is not shown in the image above, is that every line that is intended to be connected, is smoothly connected, without a small gap when zoomed in. I did this by playing around with the domain and range {}, in which I found the intersection points of two lines, restricting them accordingly. I am also proud of how the overall portrait turned out, and the style of the drawing.